Flotsam Survivors & Specialists: Birdkeeper, Chemist, Electrician & Aquaculturist
How survivors, drifters and the four Flotsam 1.0 specialists work: rescuing people at landmarks, story-trait bonuses, Drifter Duties priorities, morale modifiers and the specialist questlines unlocked through Radio Signals.
Drifters are the engine of a Flotsam town. Buildings do not produce anything by themselves; every workshop, boat and desalination unit needs a person, and every person needs water, food, rest and a reason to keep working. The 1.0 update deepened that system with specialist questlines and a Radio Signals choice, but the basics still decide whether a town runs smoothly.
Source note
This page is compiled from the official Steam store page, Pajama Llama's official 1.0 announcement, a 1.0-era public beginner guide, the 2020 Steam Quick Start Guide written for version 0.3.7, and the official store screenshots. It has not been played through in 1.0.1f7. Some details come from public guides rather than a current in-game test.
Drifters and specialists
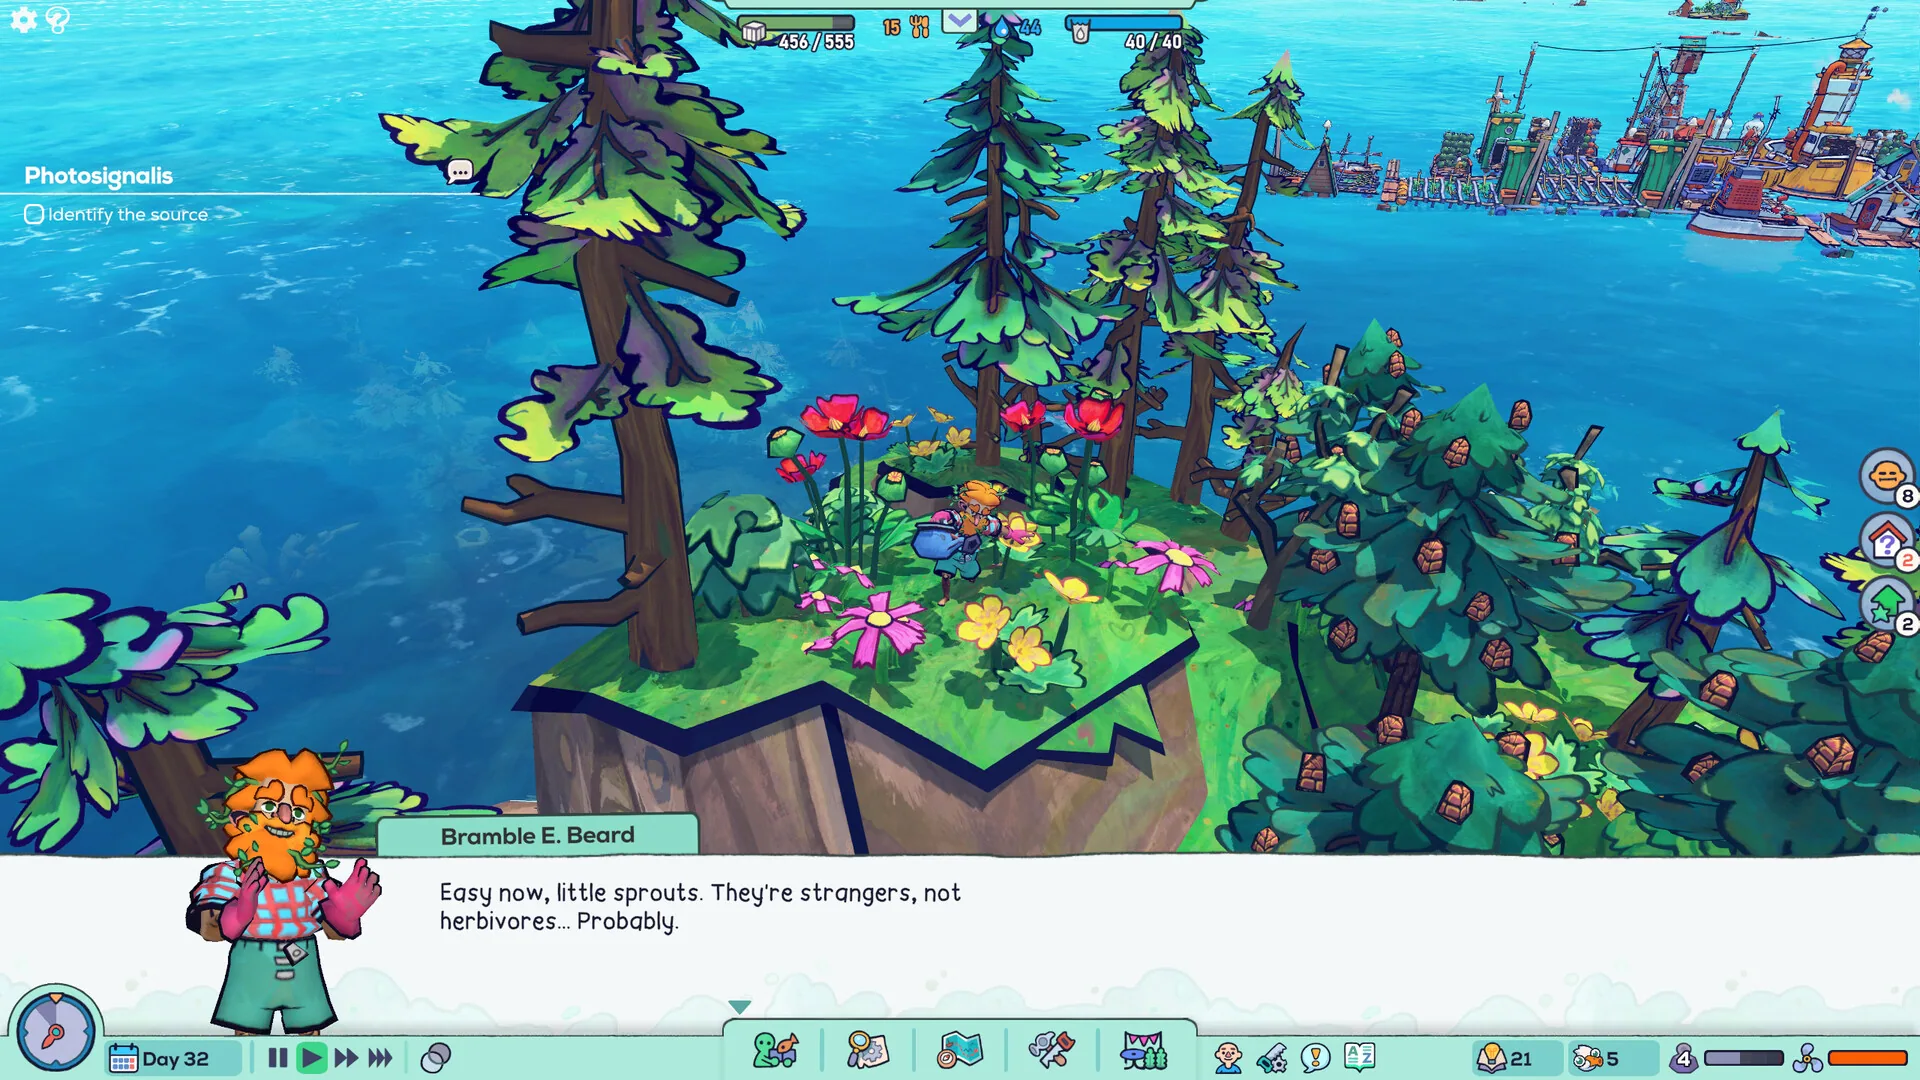
Every rescued survivor is a drifter: a worker with a name, a portrait, two story chapters and a set of stats. Specialists are drifters with a role attached. The official store description says specialists unlock new buildings, quests and discoveries, and names the Birdkeeper, Chemist and Electrician as examples.
The 1.0 announcement lists four new specialists — Chemist, Electrician, Birdkeeper and Aquaculturist — and says every specialist now has their own questline with specialist-specific quests and new buildings.Official| Specialist | What the official material says | What it does not say |
|---|---|---|
| Birdkeeper | A specialist with a 1.0 questline and role-specific buildings | The exact building list and unlock trigger |
| Chemist | A specialist with a 1.0 questline and role-specific buildings | The exact building list and unlock trigger |
| Electrician | A specialist with a 1.0 questline and role-specific buildings | The exact building list and unlock trigger |
| Aquaculturist | New in 1.0, with the same questline structure | The exact building list and unlock trigger |
This page will not invent a per-specialist unlock table. The official announcement names the roles and the structure, not every building. If a guide lists exact specialist rewards without a source, treat it as a player report.
Radio Signals and quest choice
1.0 added a Radio Signals system that lets you choose which specialist or questline to pursue. That matters because specialist quests compete for the same exploration time and resources as the main story.
The practical approach is to pick the specialist whose role matches the bottleneck you actually have. If water is unstable, a specialist quest that adds water infrastructure is worth more than a cosmetic or late-game branch. If food is the problem, the Aquaculturist's line is the obvious first look. The game does not publish a recommended order, so this is a judgement call, not a rule.
Rescuing survivors
Survivors and friendly animals are found while exploring landmarks: flooded ruins, abandoned boats and forgotten islands. The official store description frames rescue as one of the main exploration rewards, alongside old technology and resources.
Rescued drifters arrive with random story chapters, so you cannot hand-pick their bonuses the way you can with your founders. That is the trade: more people means more production, but also more demand for water, food and housing, and a random spread of stats.
Public guides say rescued drifters roll random traits and that a perfect +20 single-stat combination is roughly a one-in-ten result. The 2020 Steam guide gives the same rarity estimate for version 0.3.7; it has not been re-checked in 1.0.1f7.Story traits and stats
Each drifter carries two story chapters. A chapter can give two minor bonuses (+5 each) or one major bonus (+10), and the rarest combinations reach +20 in a single stat. Founders are the only drifters whose chapters you choose before the run.
The stats that matter in the early game, according to the two public beginner guides, are:
- Crafting — Floaters, planks and production speed;
- Cooking and Desalination — the two survival chains;
- Athletics — hauling;
- Nautics — salvaging;
- Construction — building speed.
Drifter Duties
The Drifter Duties screen is a grid: one row per drifter, one column per job, and a priority control in each cell. It is the difference between a town that works and a town where the best crafter spends the day hauling scrap.
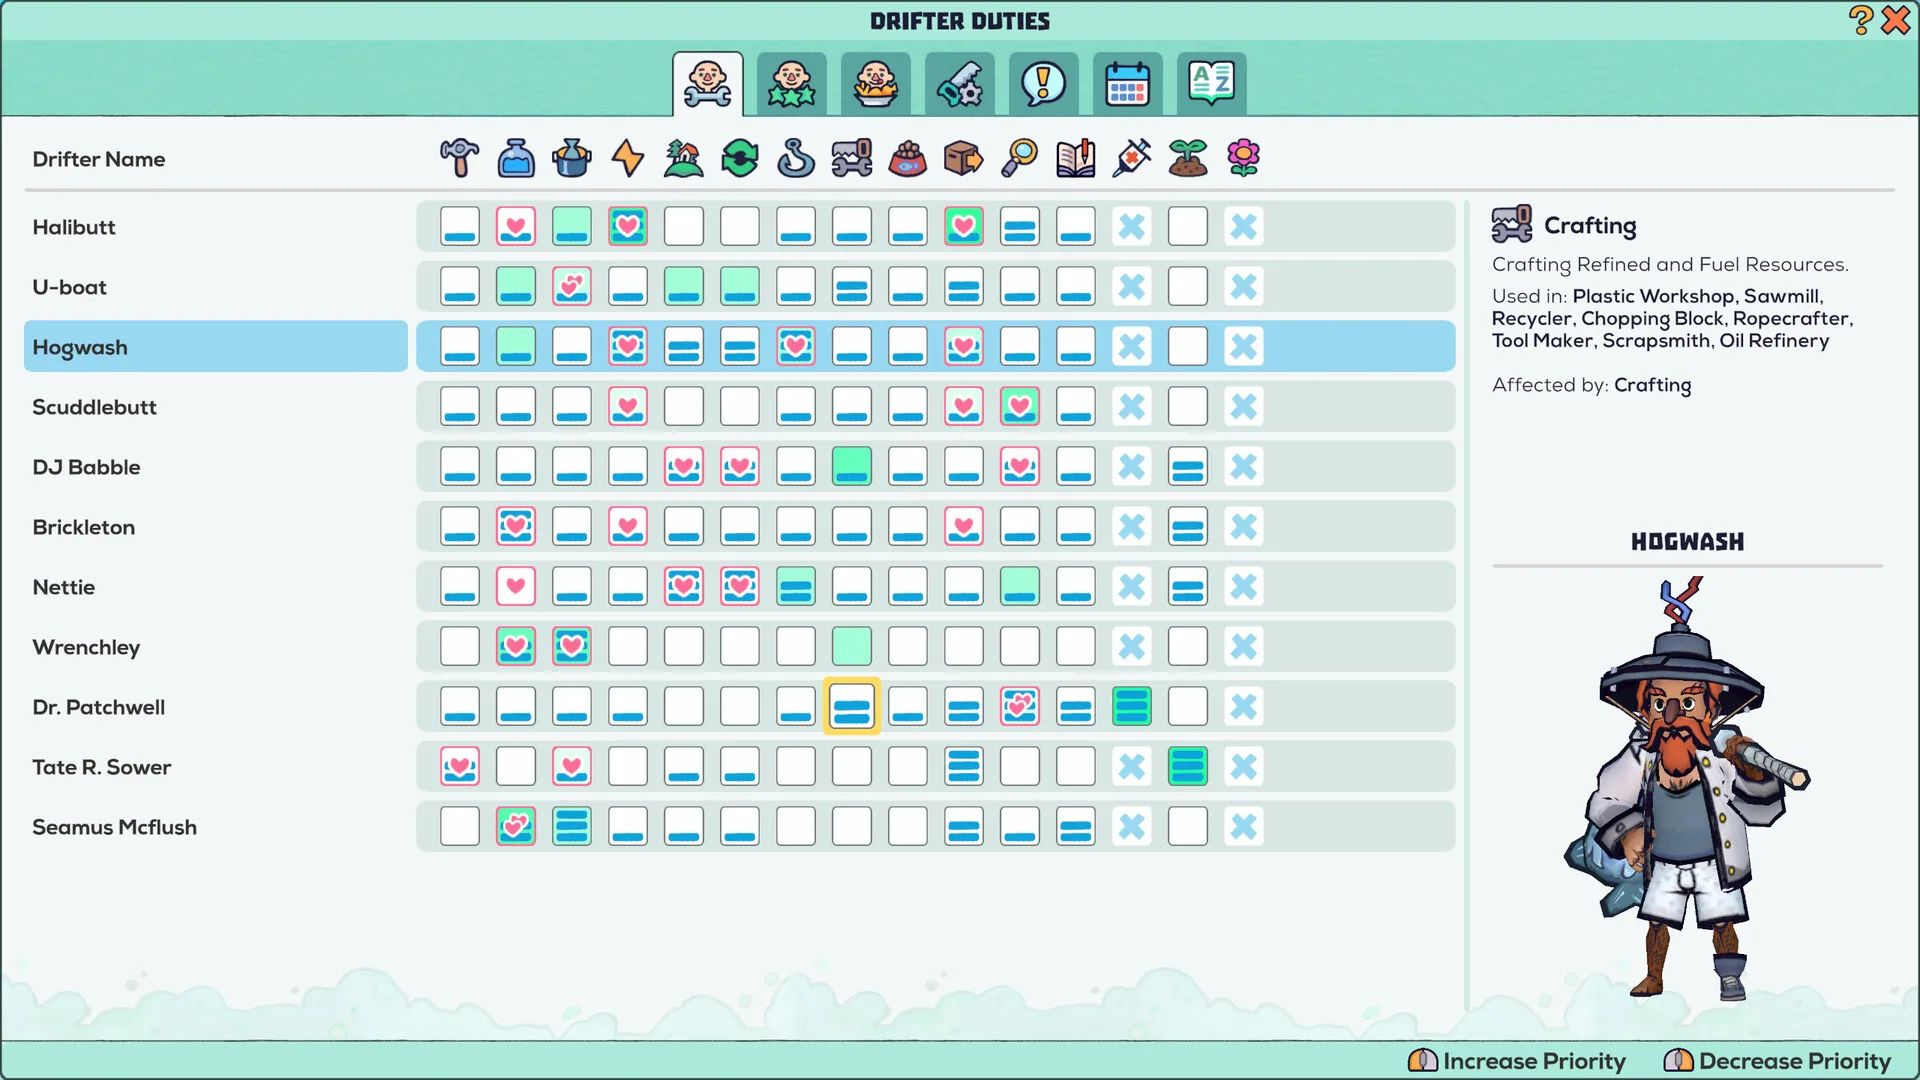
Two habits that survive the version gap:
- Raise the baseline first. A uniform priority prevents a single job from consuming a drifter who should be elsewhere.
- Specialise on top of the baseline. A +15 or +20 Crafting drifter should be on crafting, not salvage, even if salvage is urgent.
Morale
Morale is not a hidden mood meter. The drifter panel lists every modifier, positive and negative, with its value. The official store screenshot shows a drifter at a morale score of 50% with these lines:
| Modifier | Value |
|---|---|
| Expertise modifier | +25 |
| Living in a beautiful town | +15 |
| Got a shoddy home | +10 |
| We travelled a long way | +5 |
| Ate an Ordinary meal | +5 |
| 1x I'm hungry | −10 |
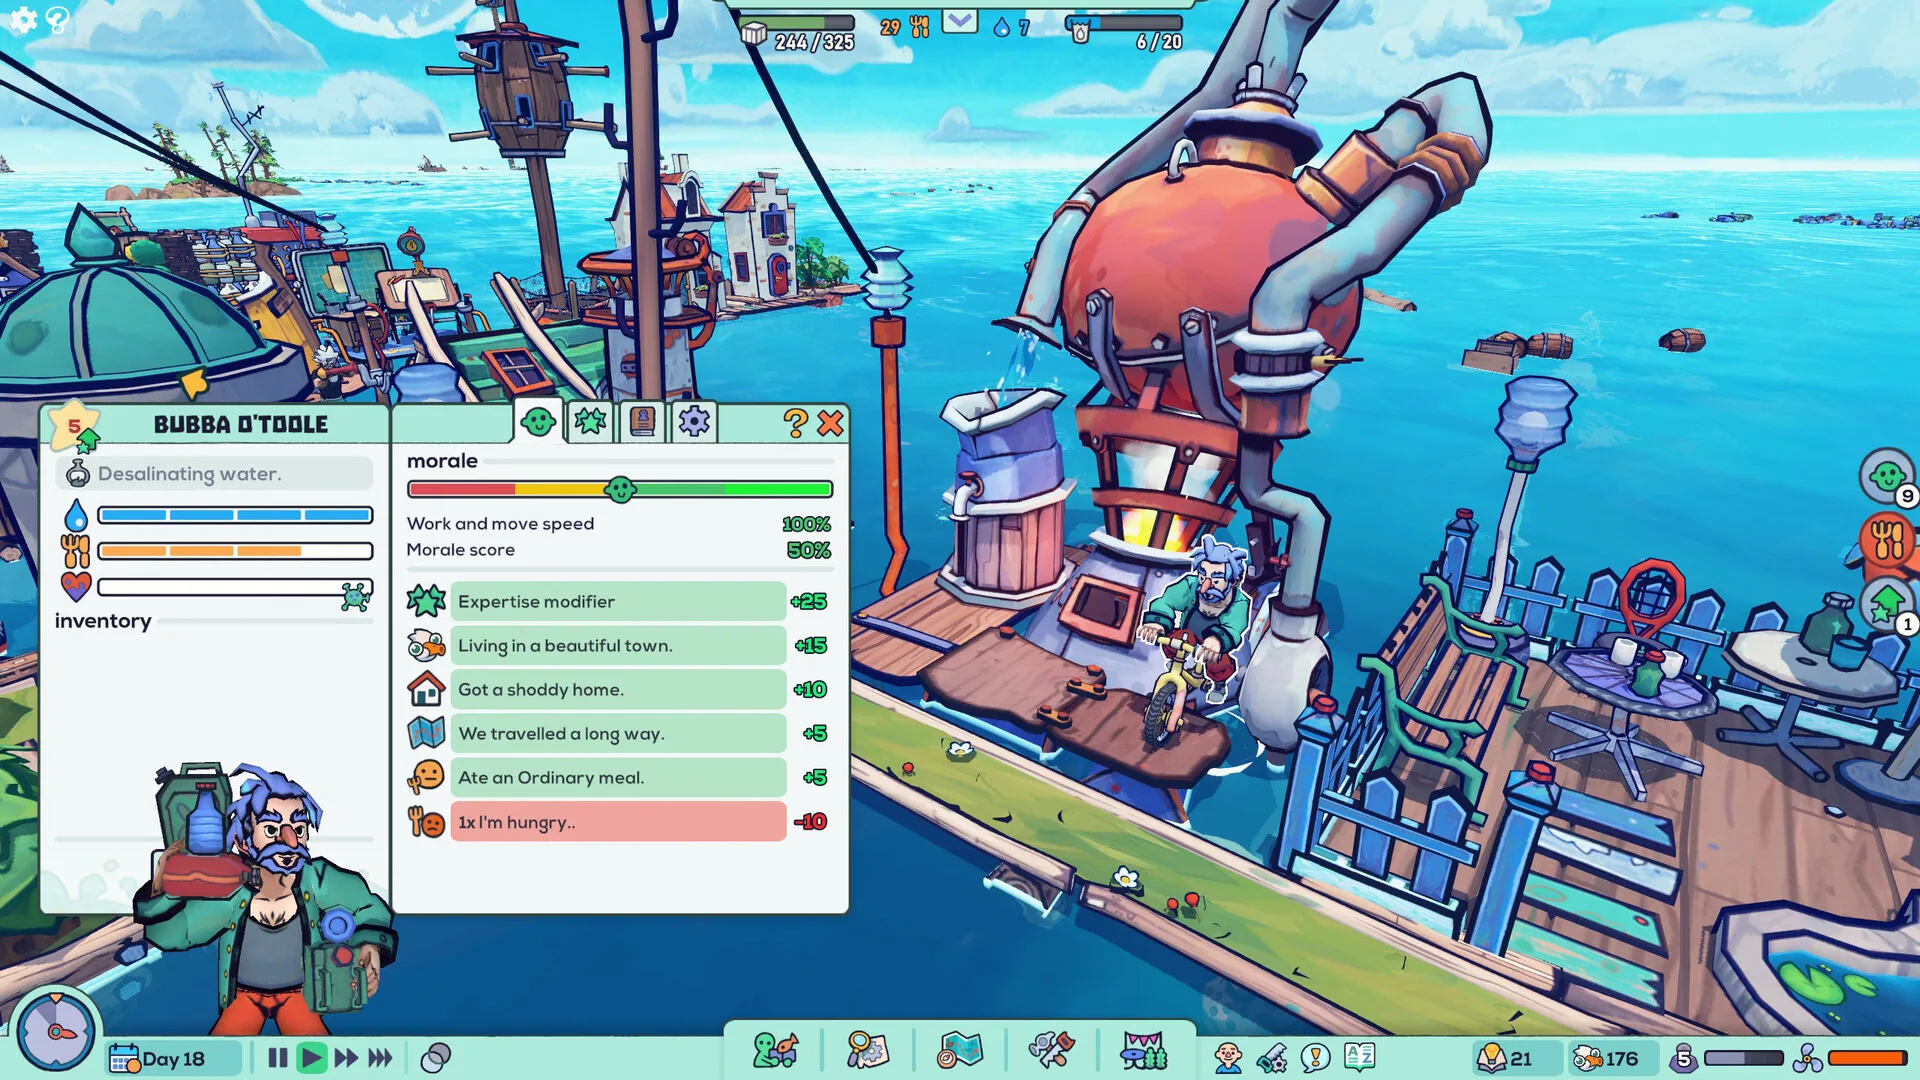
Read the panel literally. If hunger is the only red line, the fix is food, not decoration. If housing is low, upgrade the home. If travel is dragging morale down, plan shorter moves or accept the temporary hit. The screenshot values are from the official store material, so treat them as an example of how the panel reads rather than a universal score table.
The exact morale values shown in the store screenshot may come from a specific build. This page uses them to explain the panel, not as a permanent balance table.What this page has not verified
Checked against public sources on 6 November 2026, not played through in 1.0.1f7:
- The exact unlock trigger for each of the four specialists;
- The full list of buildings each specialist unlocks;
- Whether the Y hotkey still opens Drifter Duties;
- The current stat effects and trait rarity table;
- Whether the morale values in the screenshot match the current build;
- Whether rescued animals such as seagulls still gather wood and what they eat.
If the in-game panel or quest log disagrees with this page, the game is right.
Read next
- Beginner guide: first-day build order: where people fit in the opening.
- How to get fresh water: the job most likely to be understaffed.
- How to get food: the other chain that depends on drifters.
Frequently Asked Questions
Who are the specialists in Flotsam?
The official 1.0 announcement lists four: the Chemist, Electrician, Birdkeeper and Aquaculturist. Each has a specialist questline and unlocks buildings tied to the role.
How do I unlock a specialist?
Rescue survivors while exploring, then follow the specialist quests. The 1.0 Radio Signals system lets you choose which specialist or questline to pursue. The exact trigger for each specialist is not published in one official list.
Do specialists have their own quests?
Yes. Pajama Llama's 1.0 announcement says every specialist now has their own questline, bringing new buildings, tasks and small adventures.
Why are my drifters unhappy?
Open the drifter's morale panel. It lists every modifier separately — housing, town beauty, travel, meal quality, hunger and expertise — so you can fix the actual line item instead of guessing.
What do the drifter stats do?
Public guides describe Crafting, Cooking, Desalination, Athletics, Nautics and Construction as the main stats, affecting production speed, food and water work, hauling, salvaging and building. The official game does not publish a full stat table.
Can rescued drifters have better traits than my founders?
They can, but their story chapters are random. Public guides put a perfect +20 single-stat roll at roughly one in ten drifters, which is why the founders' hand-picked traits matter.
Related guides
Flotsam Beginner Guide: First-Day Water, Food & Buildings (1.0)
A first-day route for Flotsam 1.0: collect floating plastic and wood before it drifts away, recycle Floaters, make planks for power and a Desalinator, then stabilise food with a Scrapsmith, Mooring Point and Fishing Boat.
Flotsam: How to Get Food (Fishing Boat, Fish Sticks, Fryer & Farms)
How to fix food in Flotsam 1.0: turn metal scrap into Metal Plates, build a Scrapsmith, Mooring Point and Fishing Boat, cook the catch, then add farms and a Food Truck. Includes why seaweed alone stalls and why drifters stay hungry.
Flotsam: How to Get Fresh Water (Desalinator, Solar Still & Firewood)
How fresh water works in Flotsam 1.0: build a Desalinator after the Manual Power Generator, keep firewood queued, add a Solar Still for passive water, and fix a water supply that keeps dropping.