Abyssal Lapidary Beginner Guide: Daily Loop, Appraisal and Safe Extraction
A starter guide to the demo: how the day works, how many stones to buy, what the monocle tells you, how to strip host rock without shattering the gem, and when to facet or take a commission.
Learn the daily loop first
A day in Abyssal Lapidary revolves around Vermilion House's opening hours. Ore merchants bring rough stone, you decide what to buy, then appraise, extract, facet and set it. Finished pieces go to commission clients or the auction house.
The number of customers per day is limitedOfficial; the interface shows Remaining Guests. After the last customer, you can sort inventory, check the business log and calendar, then move to the next day.
Use the calendar and business log
The in-game calendar and business log record what you bought and delivered. When you cannot remember why a commission lost money, read the log instead of guessing.
Step one: do not buy a pile of rough stone
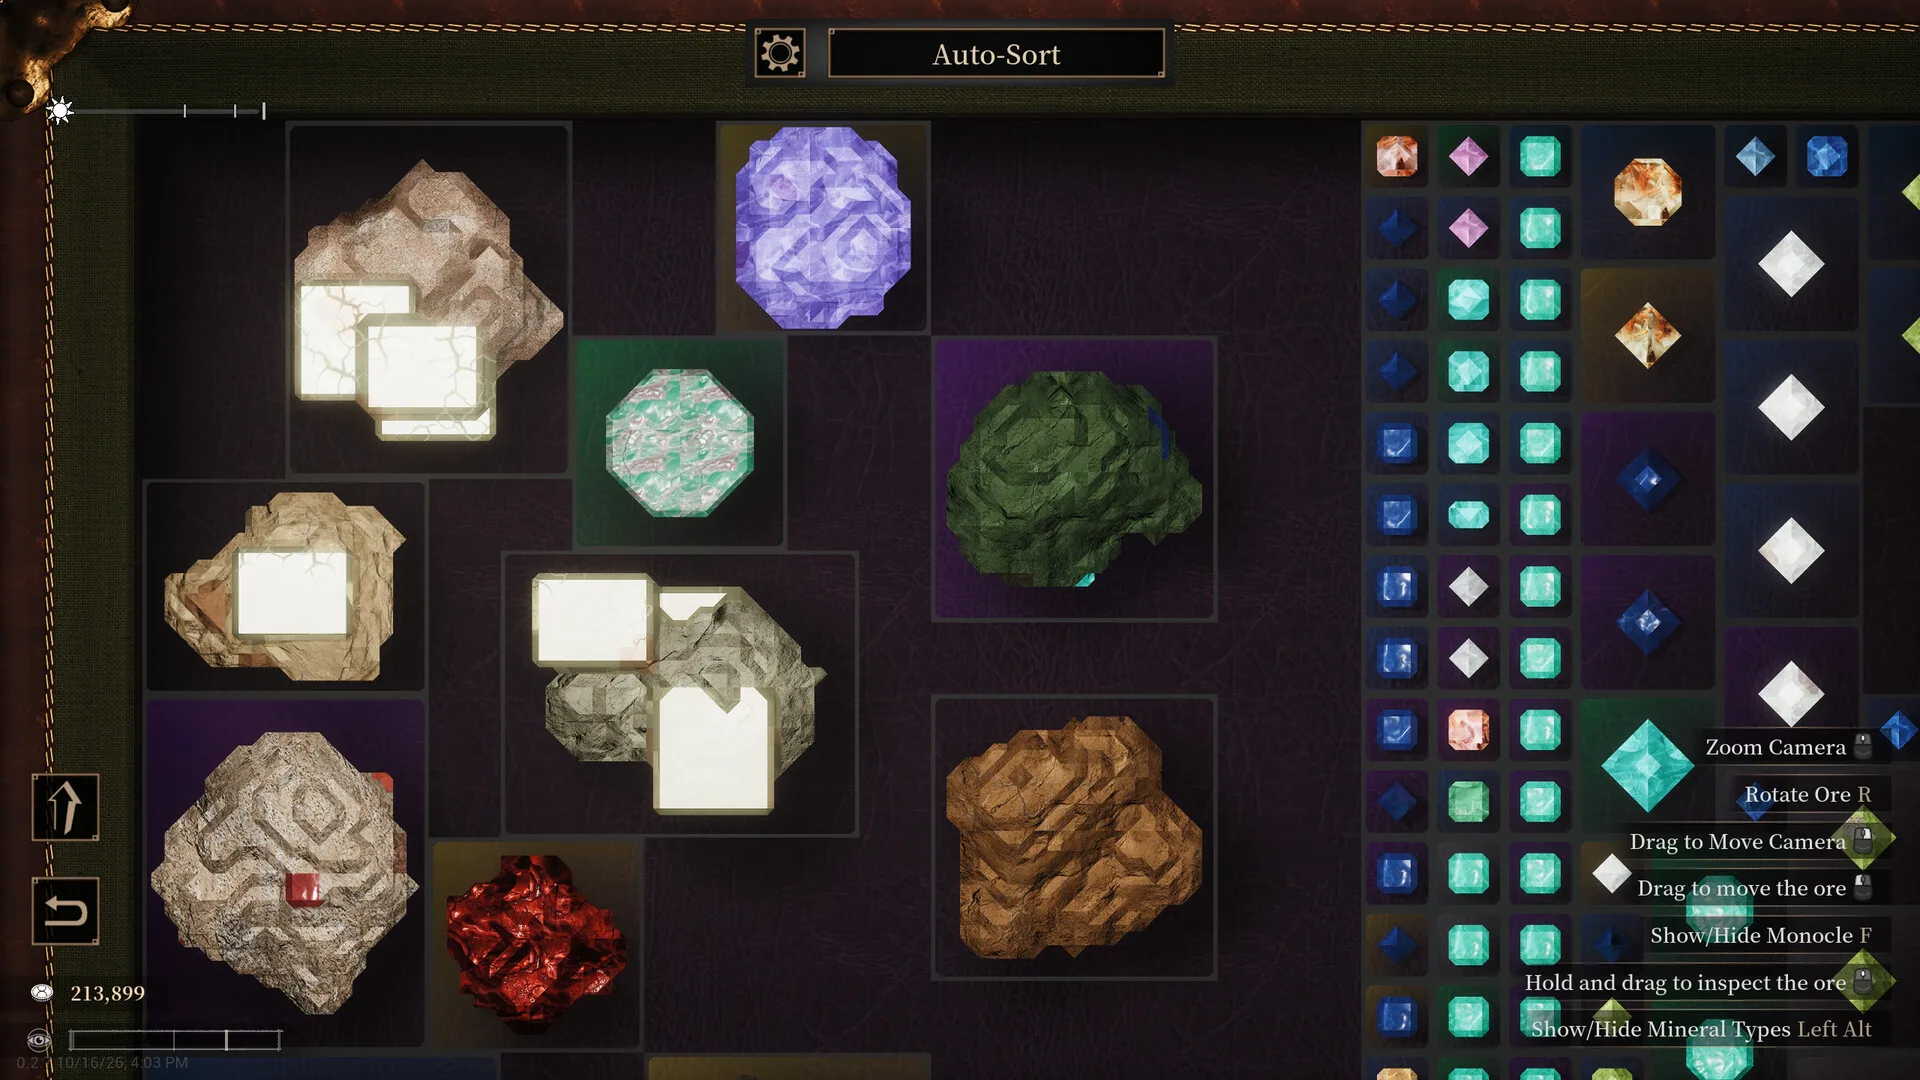
Community guides recommend starting with two or three stonesPlayer-tested. The reason is practical: buying, appraising, extracting and delivering all take time, and a large batch freezes cash before you can read a stone.
Buying rough stone and processing it are separate decisionsPlayer-tested. Cheap rough is not automatically worth cutting, and expensive rough can still lose money once opened. Ore merchants sell mixed lots; some may be worthless, while others may hide a rare gem.
Step two: appraise with the monocle
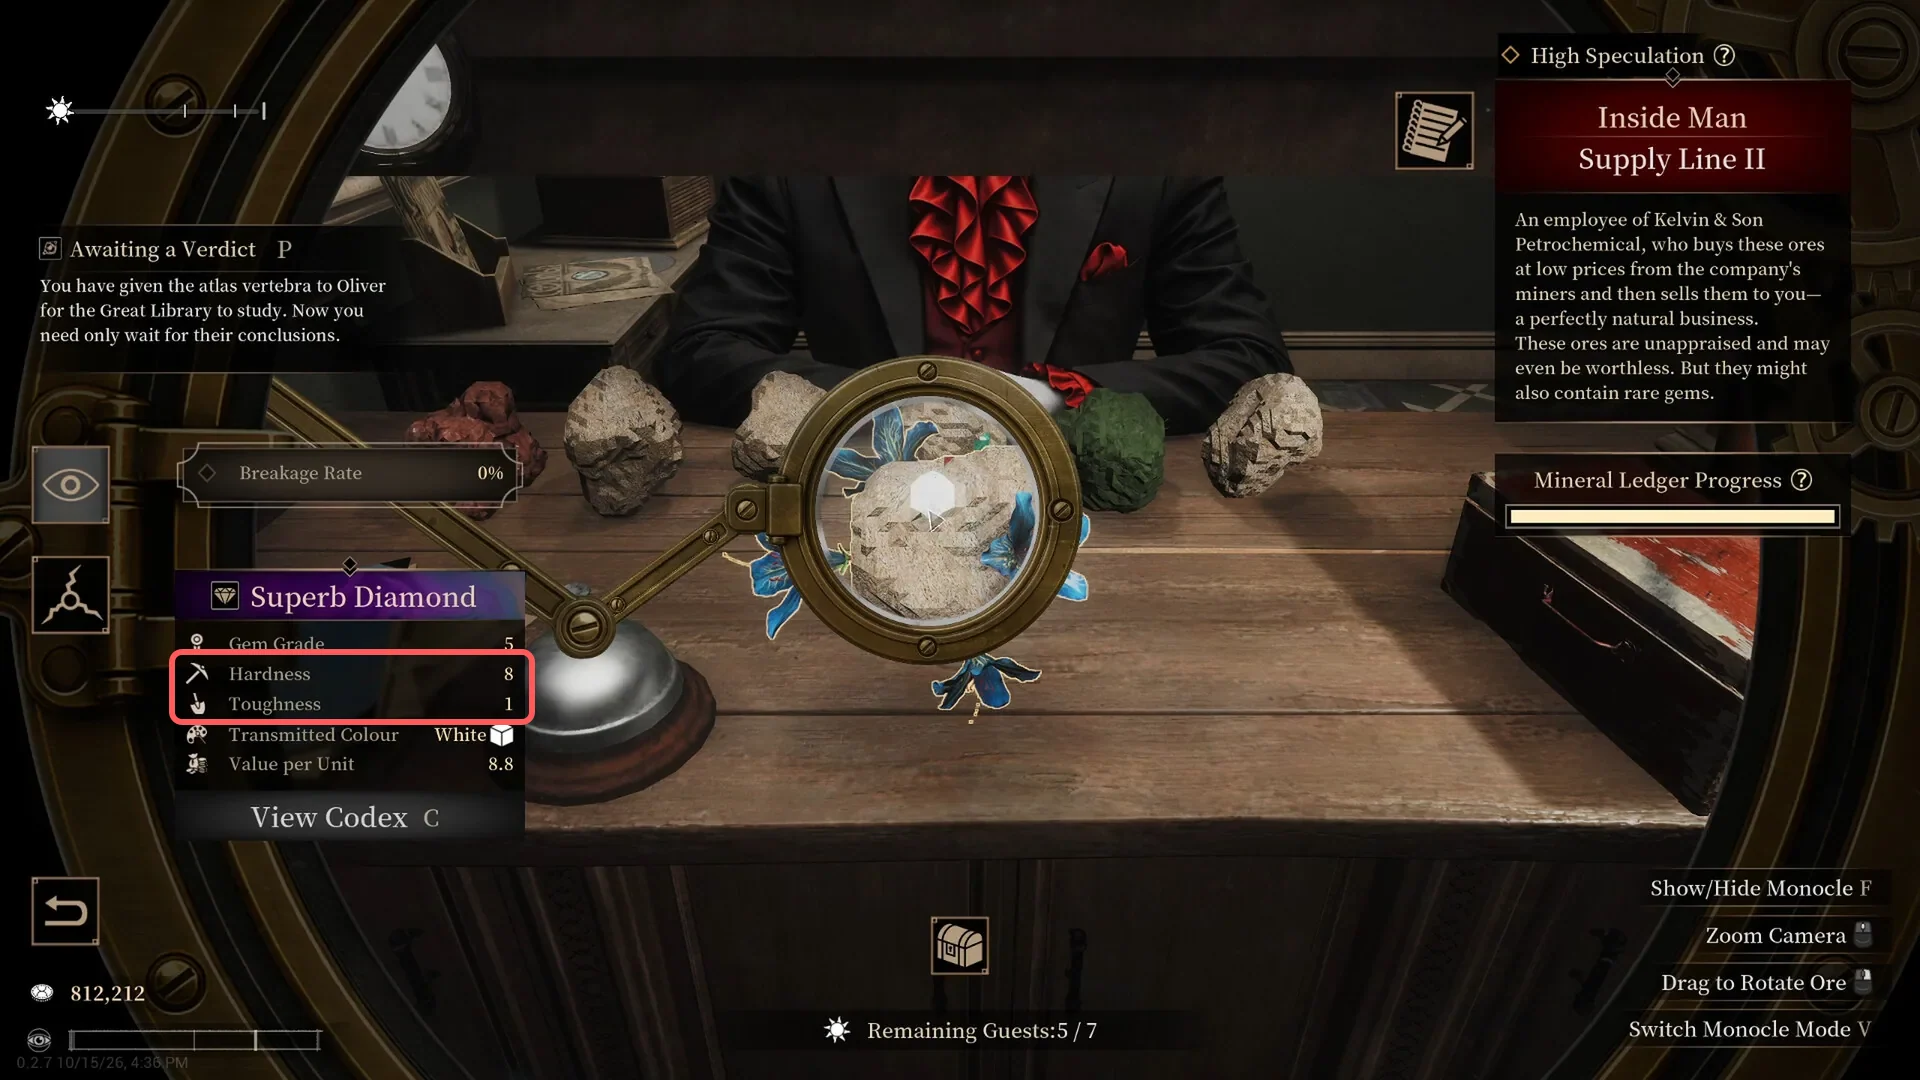
Inspect every stone with the monocle before payingPlayer-tested. It is not just a magnifier: the interface exposes the numbers that decide whether the stone is worth processing.
| Stat | What it tells you |
|---|---|
| Gem Grade | The base tier of the finished gem |
| Hardness | Which tools can break the host rock efficiently |
| Toughness | Lower means more brittle and easier to fracture |
| Transmitted Colour | How the finished gem will look and sell |
| Value per Unit | A rough check on whether the stone is worth the work |
| Breakage Rate | The current risk of damaging the stone |
Three practical rules:
- Do not judge by size. A large rock may hold one small, low-value gem.
- Hardness and toughness are different. High hardness does not mean tough; high-hardness, low-toughness stone is exactly what chips during extraction.
- Note the strange ones. Pulsing veins or flowers growing from the rock usually mean it is not ordinary rough. Decide whether you want the risk before you touch it.
Editor's note
The most common misread in demo feedback is treating "Hardness 8" as "safe to hammer". Hardness only says how hard the host rock is to break; Toughness 1 is what makes the gem brittle. Hammering that stone is how you chip it.
For the full appraisal and buying rhythm, see the cutting and breakage guide.
Step three: strip the host rock with the right tool
Extraction is not a one-tool jobOfficial. Hammers, chisels, fretsaws and hand drills appear on the bench, and some builds also include shovels and acid. They are matched to different mineral profiles.
The hand drill's in-game description is explicit:
Used to break ore structures, effective against minerals with higher hardness and lower toughness.
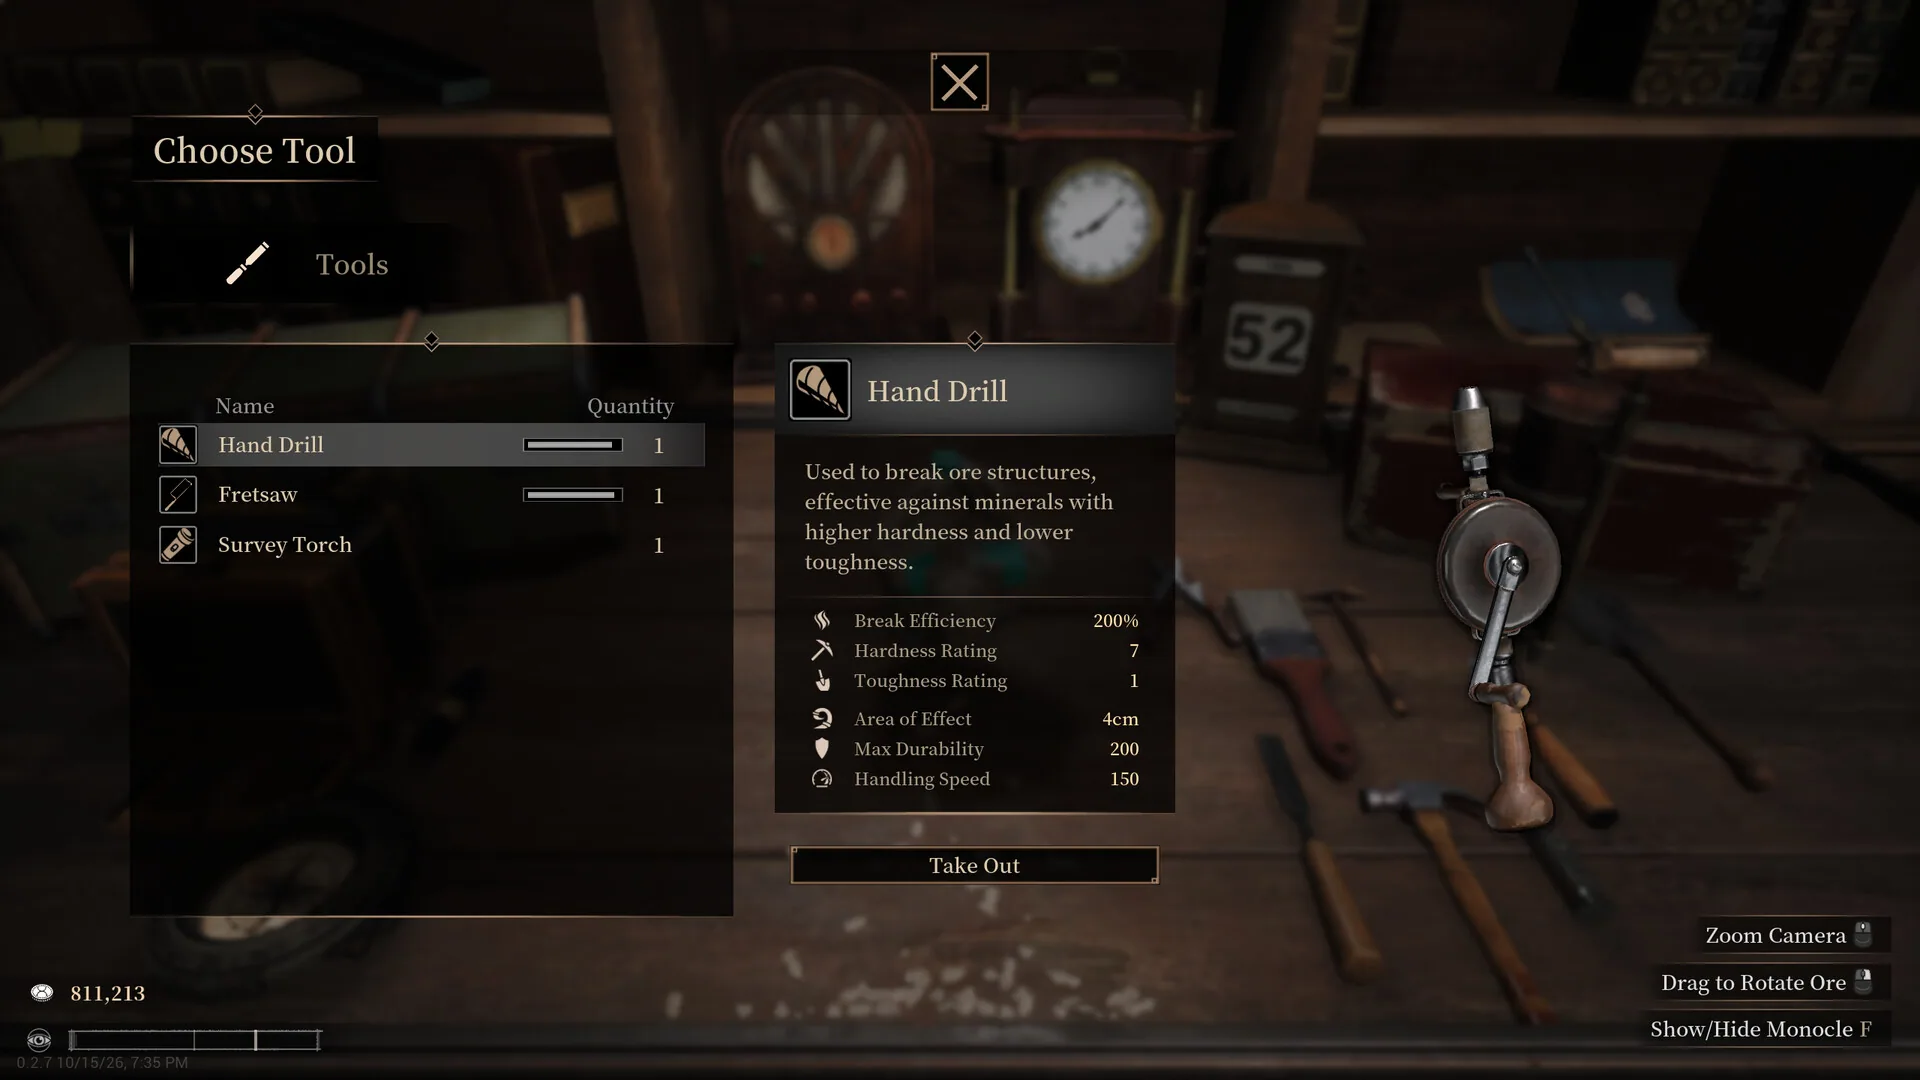
v0.2.15 added tool suitability and efficiency hintsPlayer-tested. Read the hint for the stone in front of you rather than copying a fixed recipe from an older build.
A safe extraction rhythm:
- Confirm the gem position and any fractures through the monocle.
- Pick the tool that matches the mineral and remove waste from the outer edge in small passes.
- Re-check for new cracks and chipped edges after every strike.
- If you hear an unusual crack, see crumbs, or watch a fracture spread, stop and switch tools.
The detailed rules are in the breakage-prevention guide.
Step four: faceting and flow state
Once the gem is out, the faceting table determines its shape, cut and final value. The interface shows:
- Breakage Rate: the risk during faceting; some cuts can push it negative.
- Impurity Rate: lower is better.
- Cut and Cutting Skill: direct value modifiers.
- Final Value: what the finished gem is worth.
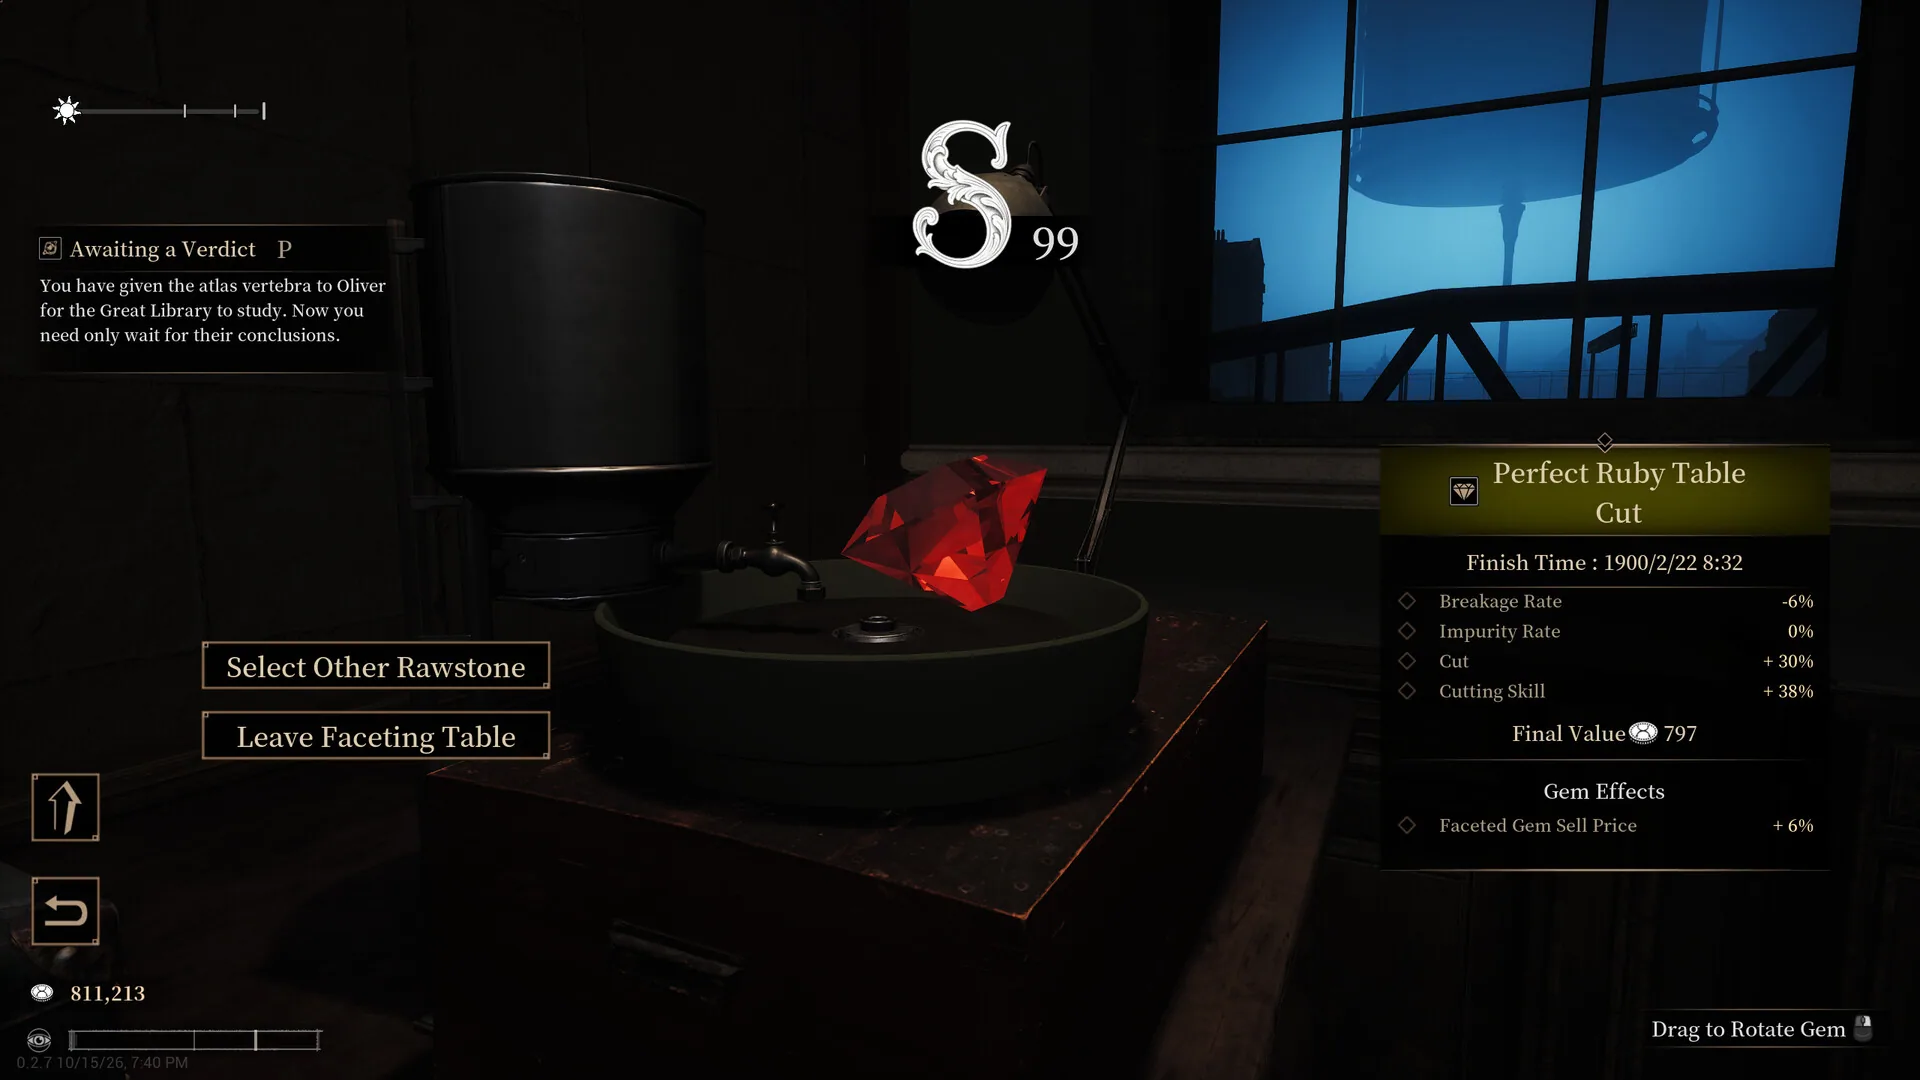
A run of perfect strikes can put the character into a flow state and produce a work beyond perfectOfficial. Flow is not guaranteed; protect the gem first, then chase the ceiling.
Faceting is licence-gated
Faceting and jewellery stations open as your licence advancesPlayer-tested. If an option is missing early in the demo, push commissions and reputation rather than assuming it is a bug.
Step five: jewellery and commissions
The jewellery bench lets you swap mounts, metals and ornament styles, and adjust Plain/Ornate and Balance/Skew. The most important control is Compare Commissions, which checks the current piece against the order.
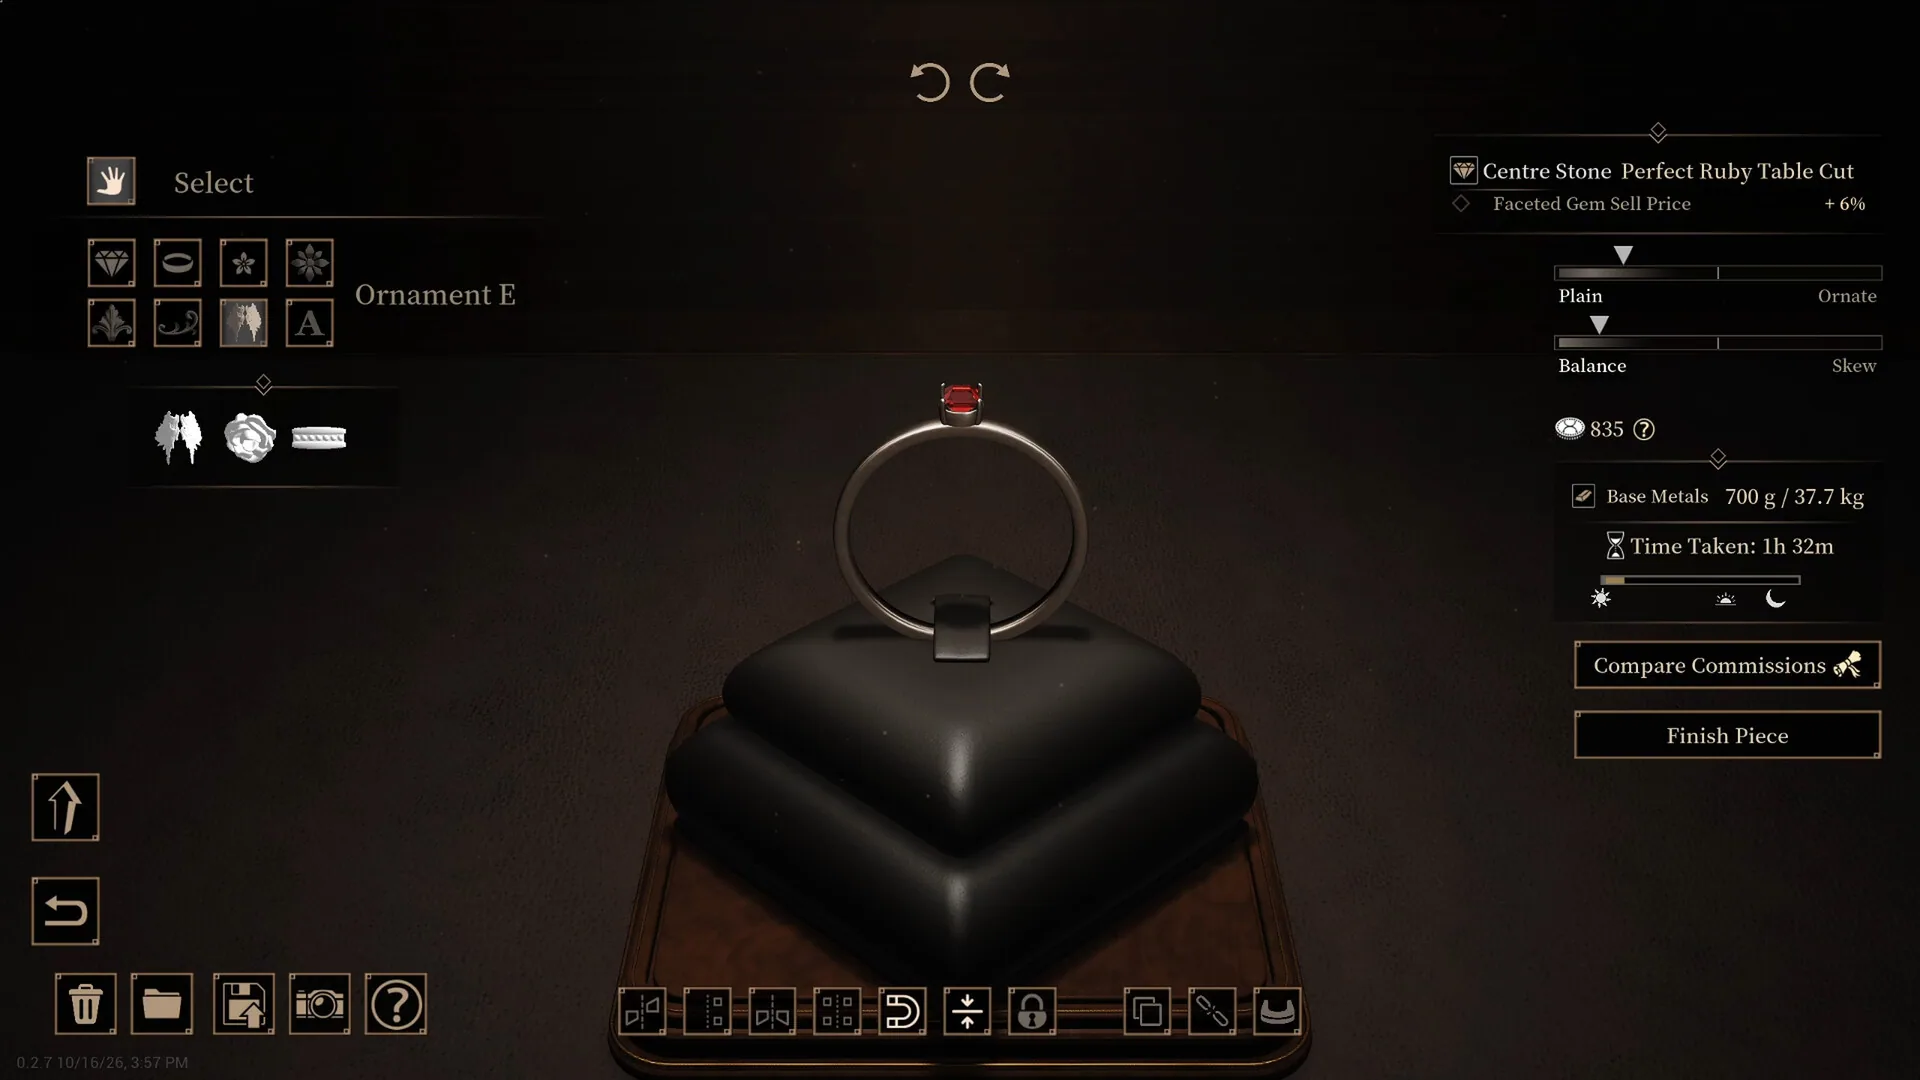
Checklist before delivery:
- Does the gem type, cut and size match the request?
- Is the piece damaged? A damaged gem fails the order outright.
- Does the client want plain or ornate work? Use the comparison screen.
- Is the reward worth the rest of your business day?
A valuable gem is not necessarily the gem this commission wantsPlayer-tested. A strict order can fail even when the stone itself is worth a lot.
What to upgrade first in the demo
Resources are tight, so use this order:
- Push the licence first. Faceting and jewellery are licence-gated; unlocking them opens higher-value work.
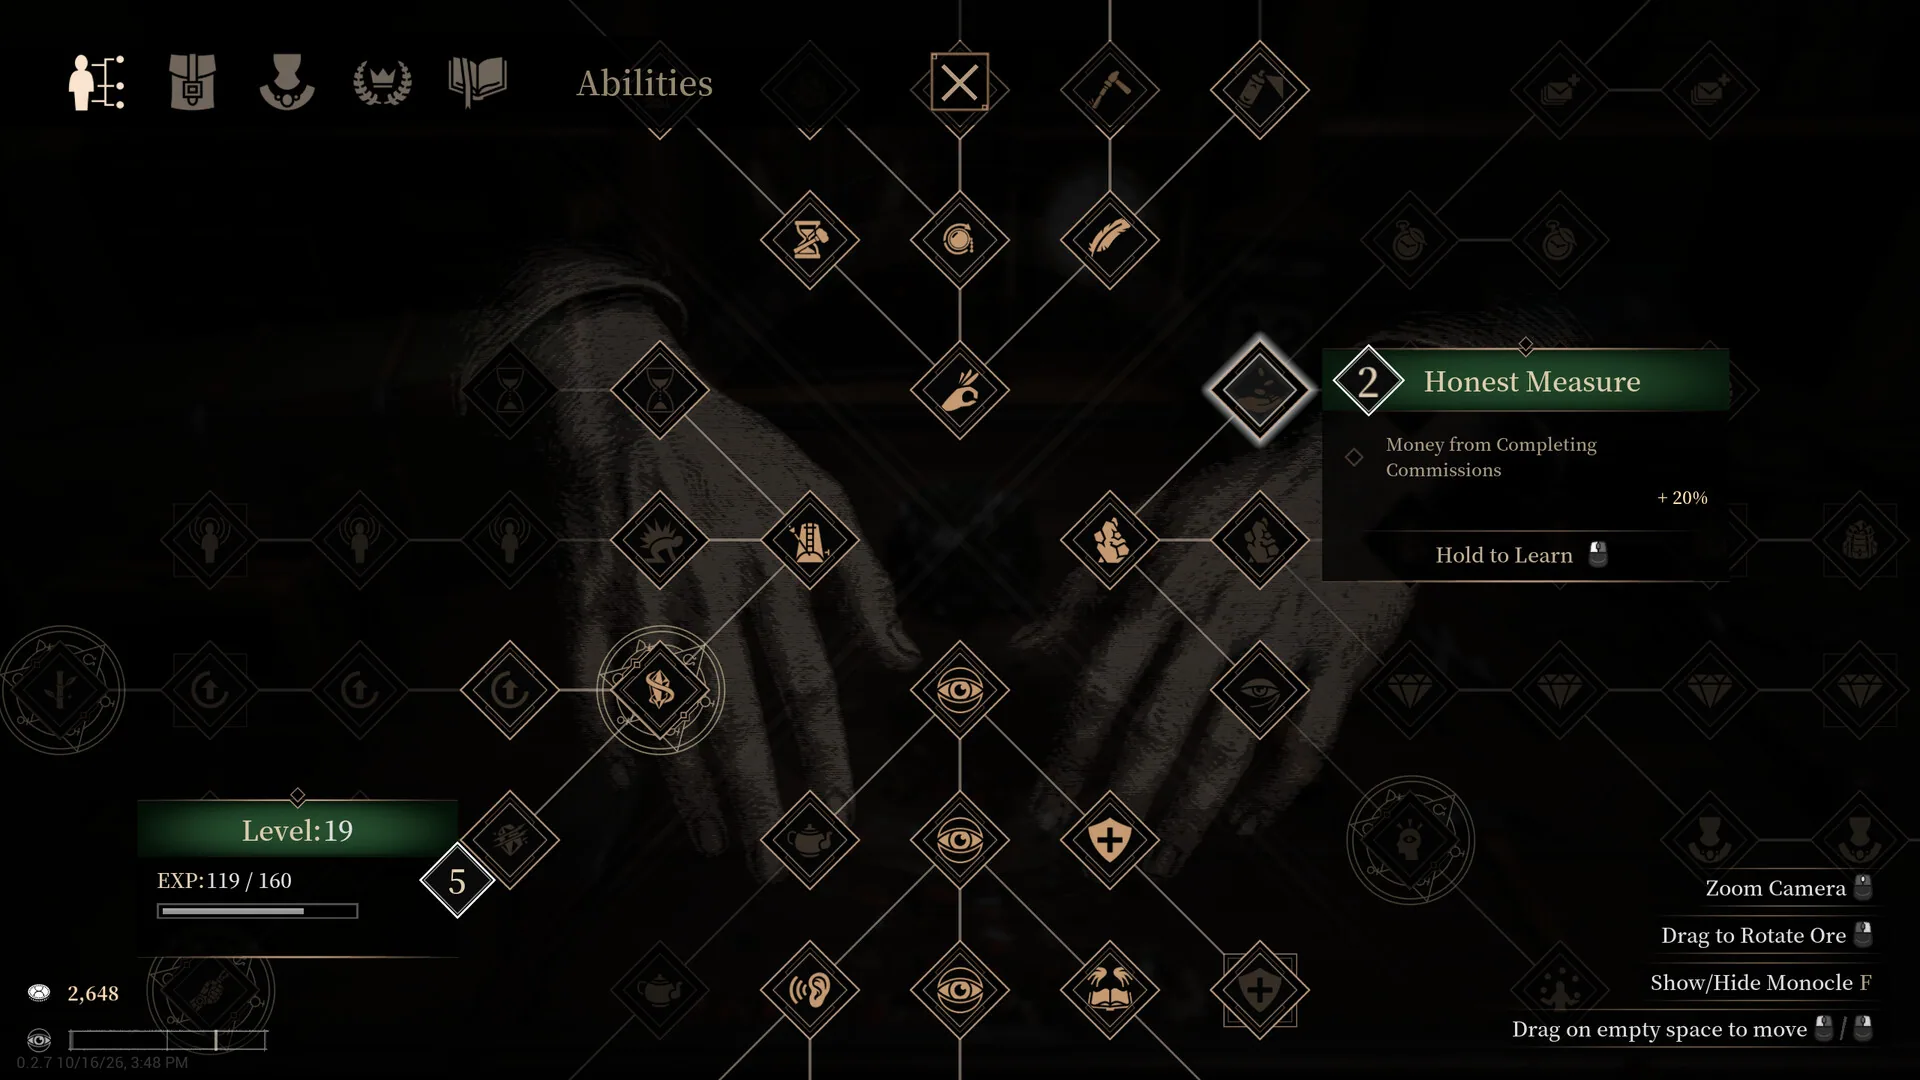
- Take commission-income skills. The skill tree includes nodes such as Honest Measure, which adds 20% to money from commissions.
- Then handle display and shop allure. Display cabinets raise allure and feed progression.
- Only then stockpile rough stone. Inventory is not wealth; unsold gems just take up space.
Three beginner mistakes
- Buying ten stones at once. Cash and time both disappear before you can read a stone.
- Cutting before reading the commission. Cut and size are hard to undo; read first.
- Hammering the same spot. Every strike reduces structural integrity, and continuing after a chip turns a damaged gem into powder.
Read next
- Fix the shattering problem properly: Cutting and breakage prevention
- Turn commissions into steady income: Commissions, auctions and licences
- What is awareness? Awareness and occult ore explained
Frequently Asked Questions
How many rough stones should I buy on day one?
Two or three. Buying ten ties up both cash and business hours before you have learned appraisal and extraction, which is how good rough gets wasted.
What should I look at through the monocle?
The internal structure, gem position, fractures and abnormal textures, plus gem grade, hardness, toughness, transmitted colour and value per unit. Inspect before paying, and do not judge by size alone.
When do faceting and jewellery unlock?
Both stations are gated by licence progress. Run early commissions, build reputation and advance the licence; the workstations open as you go.
Why do my commissions keep failing?
Read the request before buying or cutting. A valuable gem is not automatically the right gem, and a damaged stone fails the order outright.
Is there a daily limit on customers?
Yes. The interface shows Remaining Guests, and the business day ends after you serve them. Do not spend the whole day re-sorting ore.
Related guides
Abyssal Lapidary Licence & Faceting: Silver, Gold, Cut Shape vs Style
How Abyssal Lapidary licences work in the demo: Silver unlocks the faceting table, what Gold still does not say, and why cut shape is not the same as cut style when a commission asks for square.
Abyssal Lapidary Ore List: Hardness, Toughness & Stones You Cannot Clean
Abyssal Lapidary ore list from the demo: hardness and toughness where they are known, which 1/1 stones cannot be cleaned.
Abyssal Lapidary Gem Cutting Guide: Hammers, Chisels and Fretsaws
Why rough stone shatters, which tool suits which mineral, what to do when a stone splits in half, when to stop striking, and the low-toughness limitation in the current demo.
All guides for this game
- Abyssal Lapidary Licence & Faceting: Silver, Gold, Cut Shape vs Style
- Abyssal Lapidary Ore List: Hardness, Toughness & Stones You Cannot Clean
- Abyssal Lapidary Awareness & Occult Ore: What the Sanity-Like Stat Does
- Abyssal Lapidary Gem Cutting Guide: Hammers, Chisels and Fretsaws
- Abyssal Lapidary Money Guide: Commissions, Auctions, Display and Licences
- Abyssal Lapidary Release Date, Demo & Price: What Is Confirmed